Hatch every closed outline on a layer with Infill in Studio. Squares, holes, and diagonal spacing walkthrough, feature 13 of 69. Watch and try in Studio.
Hatch closed outlines in one pass with Infill, all in your browser. This is Feature 13 of 69 in the 3DPlotter V3 series: a walkthrough of the Infill tool. Draw squares with circular holes on one layer, add Infill instead of hatching each shape by hand, tune Respect Holes, spacing, and angle, export G-code, and plot in red on cardstock. No Inkscape, no parallel lines drawn one at a time.
How to use Infill
Select a layer with closed shapes
Open Studio → Add Object → Shapes & Imports → Infill
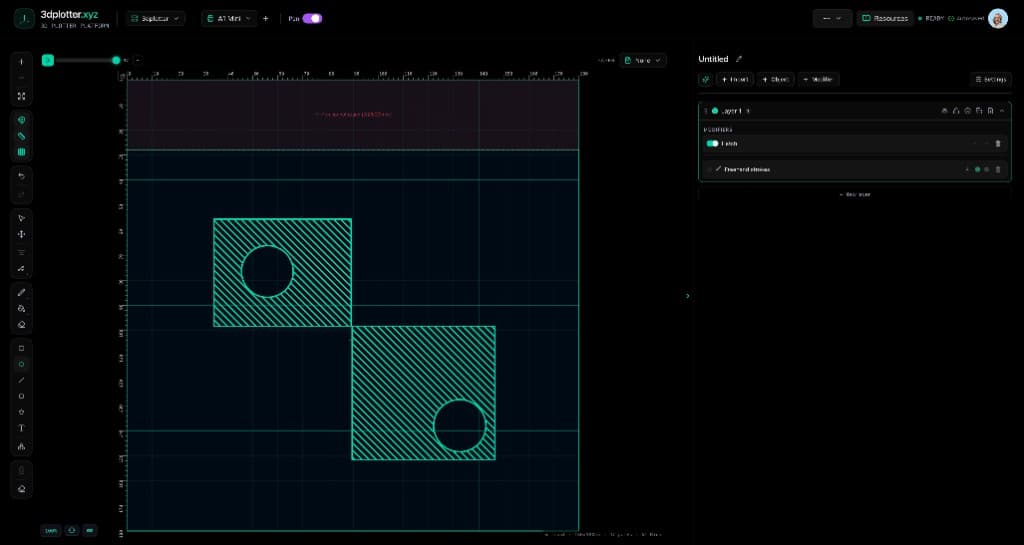
A Fill modifier node is appended; holes in outlines are respected
Menu path: Add Object → Shapes & Imports → Infill
The story behind this plot
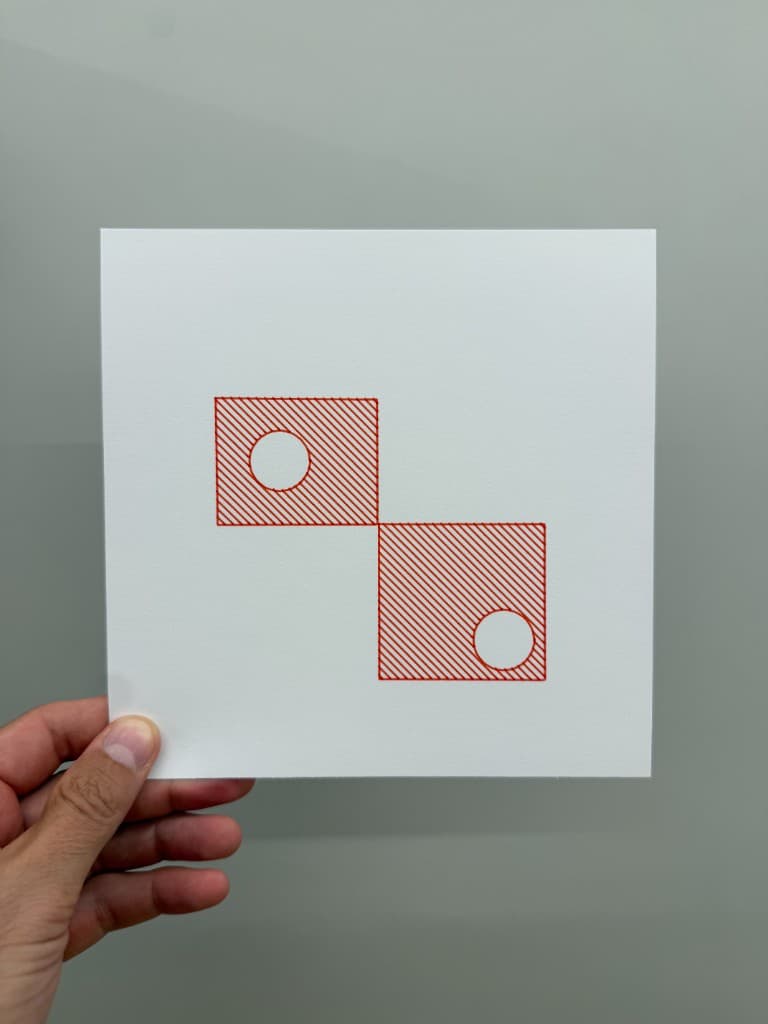
This piece is two overlapping squares, each with a circular hole, drawn on one layer. Instead of hatching each outline by hand, I add Infill once under Add Object → Shapes & Imports. Studio appends a Hatch (Fill) modifier that scans every closed path on the layer, nests inner rings as holes, and generates diagonal hatch lines in one pass.
In the video I tune Spacing, Angle, and Close Gap so traced artwork still counts as closed, leave Respect Holes on so the circles stay empty, and export G-code for the A1 Mini. The plotted card matches the canvas: red diagonal infill inside the squares, clean rings where the holes are.
What you'll learn in the video
Open Studio and add Infill under Add Object → Shapes & Imports
Draw or import closed outlines (squares, circles, freehand loops) on one layer
Let one modifier hatch every closed shape instead of filling them one by one
Find the Hatch modifier in the stack (Fill engine) and tune hatch direction and spacing
Turn Respect Holes on so inner loops stay unfilled (letters, donuts, cutouts)
Use Close Gap when endpoints almost meet after tracing or import
Export G-code and plot the infill on your pen holder
Infill (Hatch) features
One pass for the whole layer: closed outlines on the active layer hatch together
Respect Holes: nested closed paths inside an outer ring become cutouts, not second fills
Hatch patterns: Horizontal, Vertical, Diagonal, Crosshatch, Hilbert, or Solid
Spacing and Angle: pen-friendly line spacing (mm) and hatch angle for diagonal and crosshatch
Close Gap: tolerance (mm) for nearly-closed paths from freehand or SVG import
Keep Outline: export outer strokes plus hatch, or hatch only
Edge Bleed, Fill Alternate Shapes, Ensure Small Shapes Fill: fine-tune how ink meets edges and narrow regions
Acts On: This Layer or This Layer and Below
Non-destructive: remove the Hatch modifier to revert to outline-only linework
Why Infill beats manual hatching
Most workflows mean copying a shape, offsetting lines in Illustrator, or drawing parallel hatch strokes path by path. Infill reads closed geometry live: holes stay empty, spacing and angle update on the canvas, and PlotFlow exports one G-code file from Studio.
Key controls
Acts On: own, options: This Layer, This Layer and Below
Tune acts on, hatch, spacing, angle, and close gap in the right sidebar. Open Studio to see every control.
Acts On: Choose *This Layer* or *This Layer and Below* in the right sidebar.
What I plot with Infill
Solid-looking fills from diagonal, crosshatch, or Hilbert hatch on pen plotters
Logos, tiles, and geometric art with holes and inner cutouts left open
Freehand, shape, and imported SVG outlines on one layer filled in a single modifier pass
Posters and postcards on Bambu Lab A1 Mini, Prusa, Creality, and other pen-holder setups
Combined with Offset, Pen Palette, Filter, and other V3 tools on the same board
Frequently asked questions
How do I add infill in 3DPlotter?
Select a layer with closed shapes, then Add Object → Shapes & Imports → Infill. A Hatch modifier is appended to the layer stack.
Does Infill hatch every shape on the layer?
Yes. The Fill modifier finds every closed outline on the layer (within Close Gap tolerance) and generates hatch lines for each. You do not need to fill shapes one by one.
How do holes work with Infill?
Turn on Respect Holes. A closed path wholly inside another is treated as a cutout, so circles inside squares (and letter counters) stay empty instead of getting hatch.
What is Close Gap in Infill?
Close Gap is the tolerance in millimeters for treating a path as closed when the first and last points almost meet, common after freehand drawing or SVG import.
What hatch patterns can I use?
Horizontal, Vertical, Diagonal, Crosshatch, Hilbert, and Solid. Angle applies to diagonal and crosshatch modes.
Is Infill non-destructive?
Yes. Infill adds a Fill (Hatch) modifier node. Remove or disable it to return to outline-only linework.
Does Infill work with multi-pen plotting?
Yes. Set Hatch Ink on the modifier for a second pen color, or use Pen Palette on layers above or below.
Try Infill
Open 3DPlotter Studio, follow the steps above, and export a test plot. Lifetime V3 access is €29.90. Creator Bundle (€39.90) adds Map to Pen Plot, String Art, Wax Seal, and 3D Model to SVG.